Showing posts with label Dessert - Candy. Show all posts

Halloween Truffles

>> Thursday, October 20, 2011

I love holiday baking. Every time a store has its holiday section up, I go
and scout the baking supplies. I don’t know why. I have such a huge
collection of sprinkles and cupcake liners that I don’t need any more.


Last month I experienced a lot of change, and not in a good way. My friend
knew I was having a tough time, so she decided to surprise me with a few
baking presents from Amazon. I really wish she lived nearby so we could
bake together and have coffee dates


These Halloween truffles are dedicated to her because she gave me Halloween
sprinkles and liners. If they wouldn’t melt, I’d mail her some. Does anyone
have experience in mailing goodies?


They were simple (and messy) to make. You melt the three ingredients
together then chill until scoopable. Then you scoop into small balls and
roll them in sprinkles. For uniformity, I used a cookie scoop; however, you
can use a regular spoon.


Have a Halloween party soon? These truffles are perfect because you can
make a ton in such a short time. Even the kids can help (assuming you don’t
mind chocolate handprints in the kitchen ;) )

Halloween Truffles


6 ounces semi or bittersweet chocolate, finely chopped
2 Tbsp butter, softened
1/2 cup heavy whipping cream
Sprinkles to roll in
Mini cupcake liners

Put chocolate and butter in a bowl. Heat cream in a saucepan until it just comes to a boil. Pour over chocolate mixture; let stand 2 minutes. Stir with wire whisk until smooth. Refrigerate until firm enough to shape (an hour or so)

With a scoop or spoon, shape one level tablespoon of chocolate into a ball. Roll in sprinkles then place in a mini liner. Repeat. If the mixture gets too soft, refrigerate for 15 minutes then try again.

Place truffles in an air-tight container and refrigerate until firm. Store refrigerated.

Makes roughly 15 truffles.
Source: Land O Lakes

Read more...

It's Beginning To Look A Lot Like Christmas...

>> Monday, December 22, 2008

Now that Christmas is only a few days away, time to get some serious holiday baking finished. If you are pressed for time or just too tired to make any more cookies, you can make this easy Peppermint Bark. It also lets you relieve some stress because you crush the candy canes (although I had some trouble).


Peppermint Bark


All you do is melt white chocolate, mix in crushed peppermints and a little bit of peppermint extract, spread it on some wax paper, and let chill for about an hour or so. Once it is hardened, you break into chunks. Perfect when company arrives on short notice.

Source: Recipe Zaar

Read more...

Tuesdays With Dorie - Marshmallows

>> Tuesday, May 20, 2008

My birthday gift arrived in the mail yesterday. I knew I was getting it because I ordered it on behalf of my parents last week. It's what every baker should own - Baking: From My Home To Yours. I used to borrow it from the library, but it's always out on loan. Now I never have to worry!


Since I want to get involved with more challenges, I decided to join Tuesdays With Dorie. Each week, a new recipe from her book is chosen, and we have to post on the upcoming Tuesday. The challenge for today is technically madelines, but since they involved a special pan, we were allowed to choose a past challenge recipe as an alternate. I decided to make homemade marshmallows.

Before I got started, I read the problems and questions other bakers had with this recipe. Not much except they are really sticky in the pan and the gelatin smells. I could smell the gelatin a little, but not enough to deter me. And I had no problem getting them out of the pan. In fact, I think I used too much cornstarch.

I did encounter one problem - time. I made the syrup first and then tried to accomplish the egg whites and gelatin while it was cooking, but I didn't make it in time. I let the syrup sit for a few minutes as I worked on the egg whites, but by then it crystalized and could no longer be used, so I started the syrup again. I realized later Dorie uses a stand mixer, so while the egg whites are beating, you can work on other things. I only have a hand mixer, so if you are like me, do the egg whites first then the syrup.

I was really nervous because when I make fudge, it never comes out firm enough, and since the marshmallows involved sitting in a pan for a few hours, I figured they would still be a goopy mess. They were perfectly fine, which made me excited. I even tried toasting them, but they fell off the fork.

I would definitely make these again and in different flavors.


Homemade Marshmallows


About 1 cup potato or cornstarch
3/4 cup cold water
1 1/4 cup + 1 Tbsp sugar
2 Tbsp corn syrup
2 1/4-oz packets unflavored gelatin
3 large egg whites, room temperature
1 Tbsp vanilla extract

1. Line an 8x8 pan with plastic wrap sprayed with cooking spray and sprinkled with some of the corn starch.

2. Put 1/3 cup water, 1 1/4 cup sugar, and corn syrup in a medium pan over medium heat. Bring to a boil, stirring until the sugar dissolves. Once dissolved, continue to cook WITHOUT STIRRING until it reaches 265F degrees, about 10 minutes.

3. Meanwhile, in a microwave-safe bowl, sprinkle the gelatin over the remaining water (about 7 Tbsp) and let sit for 5 minutes or until spongy. Then heat in the microwave for 20-30 seconds to liquefy it.

4. Beat the egg whites in a large bowl on medium-high speed for 3 1/2 minutes. They should be firm and glossy. Don't overbeat.

5. As soon as the syrup reaches 265F, pour into already-beaten egg whites. Add gelatin and beat for another 3 minutes. Add vanilla.

6. Using a rubber spatula, scrape meringue into the prepared pan, evenly spreading to fill corners. Dust the top with cornstarch and let sit for 3 - 12 hours.

7. Once set, cut with kitchen scissors (long knife would work too). You may need to rinse and dry frequently if they are too sticky. Put remaining cornstarch into a bowl. As you cut the marshmallows, coat them with the starch and shake off the excess.

Source: Baking: From My Home To Yours, 2006 p.404-405

Read more...

I Feel So Accomplished

>> Sunday, March 09, 2008

Spring break started on Tuesday, so I haven't been online as often as I usually am. I did get a lot accomplished. I went to two internship "interviews" and waiting to hear about another one. I had lunch with a friend whom I haven't seen since graduation almost three years ago. I bought three more cookbooks. I finally uploaded all my cookbooks to my online library, which does not include the books that I am getting rid of (gasp!). I've had some baking disasters, and I've had some baking accomplishments. And this afternoon, I found out I received two awards from Megan. How cool is that? Thank you, Megan!


I'm giving both of these awards to Carla of Four Foodies because we share the same name, the same interests, and I believe she is the latest food blog I have discovered that I visit often.

Now for the baking. Remember my challenge list? I can cross off two things - 83. Bread machine and 32. Fudge.

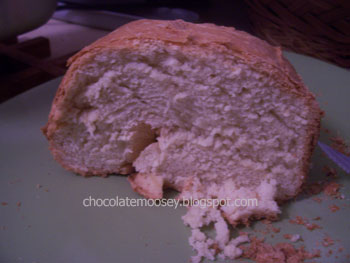
Back in February, my high school had a flea market. Crazy me found and bought a bread machine for $1.50. Yup, you read that correctly. One dollar and fifty cents. That was half off since we went during the final hour. I plugged it in and it looked functional, so I took a risk. Chances are that someone got rid of it more because of lack of use rather than it not working. It didn't come with the manual, so I found one online. It recommended making a basic white bread for the first time, so I did. I never realized how amazing fresh bread really is! It tasted like the kind you get at the restaurant while waiting for your meal. My only problem was slicing it because I'm not very even haha


Now for the best news - I finally made fudge! Not gooey stuff in a pan, but actual solid fudge, the kind you buy at the store. FUDGE! I swear this is about my sixth attempt. Now, I don't know if Alton Brown would call it fudge since it has marshmallow cream in it and therefore making it "fudge-like candy", but whatever. It still tastes like fudge. I made Cookies and Cream Fudge because I'm planning on making an Oreo bundt cake later this week, and it doesn't require a whole package. Actually, I can't call it Oreo fudge or Oreo bundt cake because it's not Oreo brand, but it's still the same concept. This fudge is very rich, so I suggest cutting into smaller squares. The original recipe makes it for a 13x9 inch pan, so I cut it in half for an 8x8 pan. Below is the 8x8 recipe.

Cookies and Cream Fudge


1 1/2 cups sugar
6 Tbsp butter
1/3 cup evaporated milk
1/2 cup marshmallow cream
1/2 tsp vanilla
1 cup white chocolate chips
1/2 cup crushed chocolate sandwich cookies

1. Line 8x8 pan with foil. Spray foil with non-stick cooking spray or grease with butter.

2. Combine sugar, butter, and milk in a large saucepan. Keep stirring until it is at a full rolling boil. Stop stirring and let it boil for 3 minutes. If you have a thermometer, the temperature should be at a soft ball stage, about 234F. If you don't have a thermometer, make sure it is at a high rolling boil (without spilling over).

3. Remove from heat. Stir in chocolate chips, marshmallow cream, crushed cookies, and vanilla. Pour into pan. Refrigerate until firm. Lift the foil from the pan. Cut into squares.

Source: Recipe Zaar

Read more...

Warning - Round Desserts Attract Curious Cats

>> Saturday, February 23, 2008

Cats are intrigued by human food. They must sniff it, lick it, and play with it. Take the Cheerio, for example. My cat stares at it, sniffs it, and *thud* it's on the floor. My dad gave him a donut hole once as a joke, but before you could even take a step back, it was knocked onto the floor. Note to self - do not give Murray the powdered sugar kind because there was a nice trail of white on the floor.

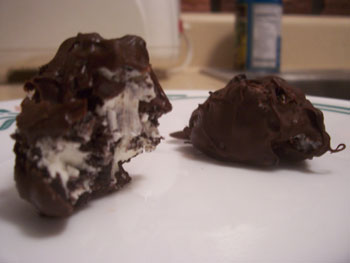
I had a small pack of Oreos leftover from Christmas. When I was home in February, I decided I wanted to bake with them rather than eat them as a cookie. I was going to make cookies and cream cupcakes, but the pack only had six cookies. So I opted to do Oreo truffles. Very easy and only required three ingredients. However, the filling was just cream cheese and crushed cookies. Next time, I might try using pumpkin roll filling so it doesn't taste like I ate a big spoonful of cream cheese with some cookies thrown in.

We didn't let Murray play with these because chocolate is poisoness to pets, but I know he had his eye on them.


Oreo Truffles


6 Oreo cookies, crushed
2 oz. cream cheese, softened
1 cup semi-sweet chocolate chips, melted

1. Crush the cookies by putting into a plastic sandwich bag and hitting it with a heavy object, such as a can or a rolling pin.

2. If cream cheese is not at room temperature, soften in the microwave until it can easily be stirred. Toss in crushed cookies. Stir until well mixed.

3. Line a cookie sheet with wax paper or foil. Roll cream cheese mixture into small balls. If you are having trouble, place the mixture into the refrigerator for 15 minutes. Place balls on cookie sheet. Place in the freezer for about an hour.

4. When an hour is almost up, melt the chocolate in the microwave. Remove balls from the freezer. Roll them into chocolate until covered. Place back onto cookie sheet. Freeze for 15 minutes or until chocolate is set. Remove from freezer for a few minutes to soften slightly.

Makes 12 balls.

Source: Recipe Zaar

Read more...

Finally, Homemade Fudge I Can Eat!

>> Sunday, August 19, 2007

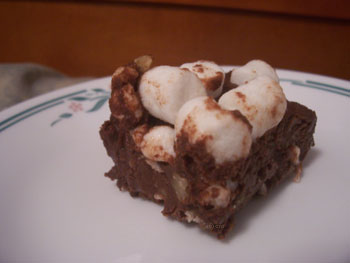
This is probably my fourth attempt at making homemade fudge. The first time turned out fine, but I lost the recipe. I thought, no big deal I can just google a recipe. The second time I made fudge, I didn't cook it long enough. Therefore, it never hardened properly, and you had to eat it with a spoon. The third time I made pumpkin fudge. Apparently you have to cook any fruit fudge precisely or it won't work. Once again, we ate it with a spoon. Now that I'm armed with a candy thermometer, I decided to make a batch for my mom's birthday. I couldn't get the temperature up to soft ball stage (about 235F) but it did go up to 230F. I couldn't turn the gas up any higher because the mixture bubbled over the top. After about 20 minutes, I said screw it and proceeded with the recipe. I'm thinking maybe my thermometer needs tested in boiling water to make sure it's working properly because the fudge turned out fine. This is only the third time I ever used it (damn you Wal Mart!).

Because I knew I'm not good at fudge, I did my research. I found this recipe to be very helpful in explaining the whys of fudge making. Unfortunately, I bought evaporated milk instead of sweetened condensed milk, so I continued my search. No luck in Google, so I went to Recipe Zaar. I did come across this recipe. I wasn't sure what it meant by a "hard boil" in the directions (well I know what it means, but you need to be precise for candy making). So I decided to use the ingredients from the second recipe and use the directions from the first recipe. I have never had rocky road fudge with almonds, so I used walnuts. I didn't do the washing down of the sides of the saucepan, but I think next time I will because I did get a little bit of the graininess from the sugar crystals.

It is possible to make fudge without a candy thermometer. You just have to be precise in timing. One source says to boil the mixture for four minutes, but I would do more Google research, just in case.


Rocky Road Fudge


1/3 cup butter, cut into chunks
1 cup evaporated milk
1 1/2 cups sugar
1/4 teaspoon salt
12 ounces semisweet chocolate, chopped
1/2 cup walnuts, toasted and chopped
1 cup mini marshmallows

1. Line a 8x8 pan with wax paper.

2. Combine butter, milk, sugar, and salt in a saucepan. Make sure the saucepan is deep enough so nothing bubbles over and a candy thermometer can be clipped on the side without the end tip touching the bottom of the pan. Stir over medium-low heat with a wooden spoon until the mixture begins to boil. As soon as the syrup starts to boil, stop stirring and clip the thermometer to the saucepan. It is important to stop stirring so the crystal structure of the sugar has dissolved. Stirring can encourage the fructose and glucose molecules to rejoin and form sucrose—crystals of table sugar (taken from Science of Candy page).

3. Let the syrup cook, undisturbed, until it reaches the soft-ball stage, about 235° F–240° F. Do not leave the kitchen in case it bubbles over! While it cooks, wash down the sides of the saucepan with a pastry brush dipped in a small amount of warm water to loosen and dissolve any sugar crystals clinging to the sides (taken from Science of Candy page).

4. Once it reaches the soft-ball stage, remove from heat. Stir in chocolate until melted. Fold in the walnuts and marshmallows. Pour into pan. At this point, you can add more marshmallows to the top if desired. Chill in the refrigerator for 2 - 4 hours. Once solid, remove the wax paper from the pan. Peel from fudge; cut into squares.

Sources: Science of Candy and Recipe Zaar

Read more...

Stay Connected

Email: chocolatemooseyblog[at]gmail[dot]com
Facebook: Chocolate Moosey Fan Page
Twitter: @chocolatemoosey
Pinterest: Chocolate Moosey's Boards
Foodbuzz: Chocolate Moosey's Profile

Copyright

© 2007 - 2012 Chocolate Moosey

All content belongs to Carla unless otherwise noted.

  © Blogger template Webnolia by Ourblogtemplates.com 2009

Back to TOP