Showing posts with label Cheese. Show all posts

Don't Let The Name Scare You

>> Thursday, August 14, 2008

I love to broaden my food palette by using new ingredients. Whenever I was looking for a beets recipe, I came across beet gnocchi and beet empanadas but didn't have the ingredients at the time. Then when I went back to my local farm for more beets, I decided to make the empanadas and picked up some swiss chard as well. Then I stopped at the store on the way home and picked up some goat cheese. Now, when I explained what I was making to my dad (no way my mom or brother would eat these), he was a tad bit skeptical. He asked me what swiss chard was, was it lettuce, what goat cheese tastes like, etc. So I did some research.

Swiss chard is in the same species as beets, making it a perfect pair with beets themselves. The taste reminds me of spinach (after all, another name for chard is perpetual spinach), so if you are a spinach fan, swiss chard is for you. If you are looking for it in the produce area, it looks like giant leaves with red stalks and "veins" (I am not a botanist).

Now for the goat cheese. I know I've had it in my cooking class in high school, and I didn't remember anything bad about it, but I also couldn't remember what it tasted like. If you are looking for it in the store, your best bet is with the specialty cheeses (not cheese slices or shredded cheese unless that is how your store is set up). Goat cheese is made with goat's milk rather than cow's milk. It is popular in the Middle Eastern and Mediterranean areas because goats can survive in areas that cows can't. It is a very creamy cheese. Kinda like cream cheese except with a drier after taste. It is definitely an acquired taste. You either love goat's cheese or you hate it.

I absolutely loved the filling. In fact, I had lots of filling left over and I enjoyed that more than the empanadas themselves (probably because they didn't have much filling in them as opposed to a giant forkful from the skillet). I think the filling would make an excellent salad, just with bigger slices of beets and bigger chunks of swiss chard. I made the dough by hand, but you can also buy it premade at the store. I started making the empanadas using only one circle dough (fill the circle and fold in half), but it was getting late and I wasn't getting much filling into each one. So I decided to use two circles per empanada. Definitely freeze the dough for 15-30 minutes before baking to minimize leakage, especially if your kitchen is warm and your dough is getting soft.

Kudos to Laylita's Recipes for taking beautiful pictures that inspired me to make these empanadas. Next time I'll make my dough circles much bigger like she did.


Swiss Chard, Beet, and Goat Cheese Empanadas
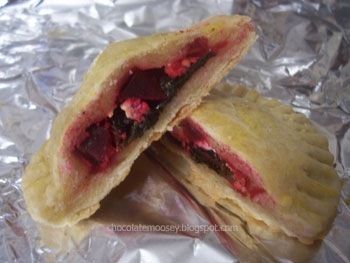


For the recipe, please visit Laylita's Recipes.

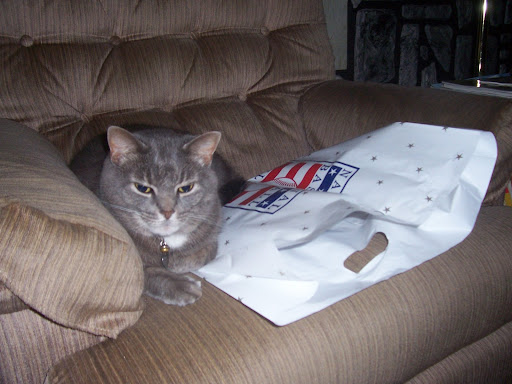
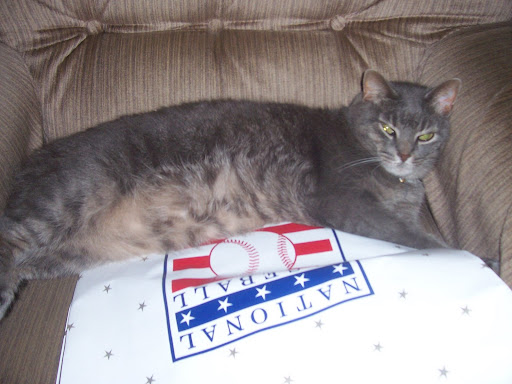
Also, how adorable is Murray? This is him laying on a shopping bag after my family and I went to the Baseball Hall of Fame in Cooperstown, NY for the weekend. You see pictures of the actual museum here.
Read more...

One Dented Can of Green Beans and a Rolling Pin Later...

>> Thursday, July 17, 2008

This past year while living at school, my one roommate would occasionally make stuffed chicken breast for her and her boyfriend. Hers was the Campbell's version with the canned soup and boxed stuffing, so it didn't appeal to me that much. However, while browsing through one of my Taste of Home magazines, I found a recipe for stuffed chicken cordon bleu. Chicken cordon bleu involves ham and swiss cheese. Until I started this blog last year, I was never a huge cheese fan. Now, I love cheese, especially feta.

This dinner is perfect for when you want to impress the people you are feeding. I bought already-thin chicken breasts because the first time I made this, I couldn't flatten the chicken thin enough. I used canned green beans, but when those didn't survive the pounding (and they deserved it - I hate canned vegetables), I resorted to the rolling pin. Don't forget to remove the toothpicks before serving!


Stuffed Chicken Cordon Bleu


4 boneless, skinless chicken breasts
4 slices deli ham
4 slices Swiss cheese
1 cup flour
1/2 tsp salt
1/4 tsp paprika
1/4 tsp black pepper
1 egg
2 Tbsp milk
1 cup bread crumbs
2 Tbsp oil

1. Preheat oven to 350F. If needed, flatten chicken to 1/4-inch thickness. Top each breast with one slice of ham and one slice of cheese. Roll up as tightly as possible. Secure each with a toothpick.

2. In one bowl, combine flour, salt, paprika, and pepper. In another bowl, whisk egg and milk. In a third bowl, place bread crumbs. Dip each chicken roll first into flour, then egg, then bread crumbs. In a small skillet, brown chicken in oil on all sides. They will not be fully cooked.

3. Transfer to 13x9 pan coated with cooking spray. Bake for 20-25 minutes or until chicken juices run clear. Before serving, remove toothpicks.

Makes 4 servings.

Source: Taste of Home Cooking For 2, Winter 2008 p. 23

Read more...

Two-In-One Dinners

>> Tuesday, February 19, 2008

My dinner schedule for this semester is crazy because although I have time to eat, I don't have time to prepare. I'm trying to make meals ahead of time by making too much when I do have time to cook so I can eat the leftovers later. But instead of eating the same meal twice in one week, I found a recipe that can be made into two different meals - tacos and pasta!

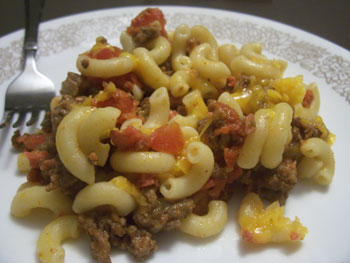
My roommates love to make Hamburger Helper, so when they make the cheeseburger kind, the smell makes me want to go buy a box. Since it is expensive (and high in sodium) to make it from the box, I decided to make it from scratch. When I was browsing for an imitation recipe, I came across bacon cheeseburger tacos. The person who posted it said she used the leftovers to make bacon cheeseburger pasta. Score! I suggest making the tacos first, then use the leftovers for pasta (unless you want pasta in your tacos).

I suggest sprinkling the cheese on top at the very end rather than letting it melt into the meat because you don't taste it as much.


Bacon Cheeseburger Tacos


1/2 lb ground beef
1/2 cup onion, chopped
1 clove garlic, minced
2 Tablespoon bacon bits
1 1/2 teaspoon chili powder
1/4 teaspoon salt
1/4 teaspoon pepper
1 cup shredded cheddar cheese
2-4 lettuce leaves

Sauce
2 1/2 Tablespoons ketchup
1 1/4 teaspoons mustard
1/2 teaspoon chili powder
4-6 small taco shells

In a skillet, cook beef, onion, and garlic until beef is brown. Drain grease. Stir in bacon bits, 1 1/2 tsp chili powder, salt, and pepper. Cook another 10 minutes.

In a small bowl, combine ketchup, mustard, and 1/2 tsp chili powder.

Fill a taco shell with beef mixture. Put on sauce. Top with cheese. Microwave about 10 seconds or until cheese has melted. Add lettuce. Repeat with each shell.

Makes 4-6 tacos, depending on how much beef goes into each taco.

Source: Recipe Zaar


Bacon Cheeseburger Pasta


4 oz elbow macaroni
2 Tbsp bacon bits
1/2 lb ground beef
1/2 cup onion, chopped
1 clove garlic, minced
1 1/4 Tbsp chili powder
3 Tbsp ketchup
1 1/2 tsp yellow mustard
1 cup chopped tomatoes
1 cup cheddar cheese, shredded

Cook macaroni according to package directions. Meanwhile, in a large skillet, cook ground beef, onion, and garlic until beef is brown. Drain grease. Stir in chili powder and bacon. Cook another 10 minutes. Add ketchup, mustard, and tomatoes and stir until well combined. Stir in pasta and cheese. Cook over low heat for about 5 minutes until cheese has melted.

Makes 2 servings.

Source: Recipe Zaar

Read more...

Not Your Typical Pasta

>> Monday, December 10, 2007

Pasta is one of the cheapest and easy meals any college student can make. All you do is boil water, cook pasta until soft, drain, and sauce. Voila!! You have a meal. Now, what do you do when you eat pasta at least three times a week? Change the sauce. You can go traditional with garlicky basil and tomatoes, classy with stroganoff, spicy with habanero pesto, or crazy with pumpkin sauce. Hmm which reminds me - I should add my creamy garlic sauce and garlic butter sauce soon.

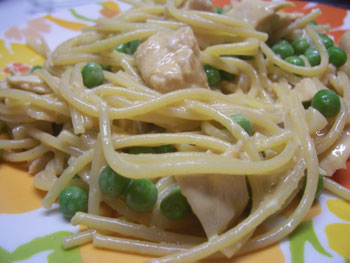
Here are two more pasta varieties. I only recommend the pad thai only if you absolutely love peanut butter. By love, I mean sitting there with a jar and a spoon and happily eating away. I love PB, but the taste was a little intense. However, it tasted better the next day, so maybe it just needed time.

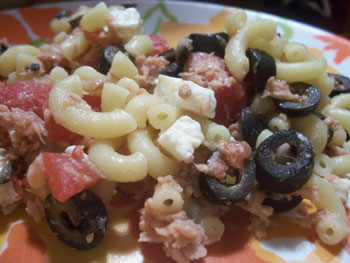
The Mediterranean pasta I made myself. To be traditional, you would use kalamata olives. However, I only had a can of black pitted olives.


Pad Thai with Creamy Peanut Sauce


8 oz rice noodles (or substitute linguine or spaghetti)
1/8 cup water
1/8 cup sugar
1 Tbsp ketchup
1 1/2 tsp soy sauce
1/8 tsp chili powder
1/3 tsp lime juice
2 Tbsp vegetable oil
2 cloves garlic, chopped
1/4 cup onions, chopped
1 chicken breast, chopped
1 egg, beaten
1/4 cup peas

Sauce
1/4 cup evaporated milk
1/8 cup peanut butter
1 tsp soy sauce
1/8 tsp ginger

1. Place sauce ingredients in a blender. Process until smooth, about 30 sec. Set aside.

2. If using rice noodles, soak them for 30 minutes in hot tap water; drain. They should be flexible but not soft. If using linguine or spaghetti, cook in boiling water until done.

3. Combine water, sugar, ketchup, soy sauce, chili powder and lime juice in a small bowl.

4. Saute chicken in oil until no longer pink. Add garlic and onions; cook until tender. If using rice noodles, add to pan. If using linguine or spaghetti, do not put in pan. Pour ketchup mixture over chicken.

5. Push chicken mixture to side of the pan. Add egg, stirring until cooked. Add peas. If you are using linguine or spaghetti, add to pan as well. Mix in peanut sauce. Makes 2 servings.

Source: Cooking with Carnation Evaporated Milk, 2006 p.14


Mediterranean Pasta


8 oz. pasta, your choice
2 Tbsp vegetable oil
2 cloves garlic, chopped
1/4 cup onion, chopped
1 small can tuna, drained
1/2 cup tomatoes, chopped and drained
1/2 cup olives, sliced
1/2 cup feta cheese

Bring water in a small saucepan to a boil. Cook pasta until soft. Meanwhile, saute garlic and onion in oil until tender. Add tuna, tomatoes, and olives. Cook until warm. Add to cooked pasta. Sprinkle with feta. Makes 2 servings.

Source: Recipe by me


Sorry for the horrible lighting, but my dad took a video of Murray being impatient for Christmas.


He's still waiting.


Read more...

A New Favorite

>> Monday, November 05, 2007

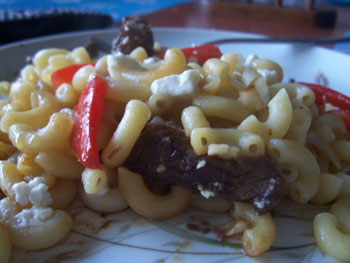
WARNING - This is the most amazing beef dish I've ever cooked/eaten. This is definitely a meal I could make weekly. You must marinade the beef in order to get the flavor factor. The recipe called for 4 hours up to overnight, but I marinaded it for an hour. Tasted amazing to me. It also says to grill or broil; I fried it in a skillet. Not the healthiest, but hey. As far as changing the ingredients, I adjusted the amount to one serving and forgot to add the sesame seeds (which I do have). I also left out the green beans.


Thai-inspired Beef and Pasta


3 tablespoons lime juice
3 tablespoons soy sauce
3 tablespoons oil
2 tablespoons brown sugar
1/4 teaspoon garlic powder
1/4 teaspoon ginger
1/4 curry powder
1 cup uncooked penne
1 beef eye round steak (I have no idea what kind of beef I had)
1/4 cup thinly slice onions
1 cup red pepper, thinly sliced
1/4 cup feta cheese
1/8 cup sesame seeds

1. Mix together 1 1/2 Tbsp lime juice, 1 1/2 Tbsp soy sauce, 1 1/2 Tbsp oil, 1 Tbsp brown sugar, 1/8 tsp garlic powder, 1/8 tsp ginger, and 1/8 tsp curry powder. Place beef in a freezer bag. Pour marinade into the bag; cover the meat as best as you can. Place in the refrigerator for at least an hour or overnight. The longer it sits, the better the flavor.

2. Once the meat is ready, pour some oil into a skillet and fry meat until no longer brown. If you're having trouble getting the middle to be brown, cut the meat into chunks. Once the meat is brown, cut into bite-size chunks (if you haven't done so already).

3. While the meat is cooking, bring a pot of water to a boil. Cook pasta until done.

4. Pour remaining lime juice, soy sauce, oil, sugar, garlic powder, ginger, and curry powder into a second skillet. Saute onions, red pepper, and sesame seeds. Add browned beef. Add in cooked pasta. Sprinkle the top with feta cheese.

Makes two servings

Source: Recipe Zaar

Read more...

Stay Connected

Email: chocolatemooseyblog[at]gmail[dot]com
Facebook: Chocolate Moosey Fan Page
Twitter: @chocolatemoosey
Pinterest: Chocolate Moosey's Boards
Foodbuzz: Chocolate Moosey's Profile

Copyright

© 2007 - 2012 Chocolate Moosey

All content belongs to Carla unless otherwise noted.

  © Blogger template Webnolia by Ourblogtemplates.com 2009

Back to TOP